
Introduction
If your choice for an online business is a blog or if your business is using a website based on WordPress then you are in the right place. In this article, I’m going to cover how to install WordPress on a Contabo VPS on Ubuntu 20.04 on a LAMP server. we have already covered what is Contabo and why it is the best. We have also covered how you can host multiple websites using virtual hosts and secure them with Let’s Encrypt Free SSL certificates. So if you want to follow along with this tutorial you can purchase a Contabo VPS first by clicking here. if you also need a domain name for your server you can click here to get one from Namecheap.
We are also going to consider other alternatives that you can use to host a WordPress website. Before that, we are going to take a brief look at what is WordPress and the different types of web hosting. This will further help us understand why we should consider installing WordPress on a VPS.
What is WordPress
WordPress is a well-known content management system. Its popularity comes from the fact it is open opensource and can be used by anyone to build a website. The main features of WordPress include the PHP language that was used to build it and also the integration of MySQL or Maria DB database. It is popularly used to build blogs and company websites. Many web hosting solutions companies offer WordPress in some form for their clients.
Bluehost and Namecheap offer a solution called Managed WordPress. The biggest takeaway from this solution is that only WordPress websites are allowed as opposed to any other files, in the case of shared hosting. Managed WordPress is optimized, and evermore streamlined to make sure that the WordPress website runs fast and performs much better.
However, in this article, we are going to cover how to install WordPress on a VPS with no control panel such as CPanel. If you would rather get yourself managed WordPress solution we strongly recommend that you go with Bluehost. Working with Bluehost means you will not need too much technical knowledge that will be covered in this topic and you are guaranteed 24/7 support from the company just in case something goes wrong or you need some assistance.
Types of Web Hosting
I have decided to touch on this topic briefly since I have already mentioned that there is shared hosting and Managed WordPress. The most common types of Webhosting are:
- Shared Hosting
- Virtual Privates Servers
- Dedicated Hosting
- Managed Hosting
- Cloud Hosting
However, I’m only going to cover what is relevant to this topic. Managed Hosting is what I discussed earlier when I mentioned that you can get preinstalled WordPress which is optimized to run as efficiently as possible. This is also considered to be similar to shared hosting whereby all resources are managed by the hosting company and what you need to worry about is your website. With shared hosting, your resources are shared with other customers and you won’t normally need to worry about the technical details of the server. Bluehost and Namecheap are best at offering such solutions.
However, in this article, we are covering VPS hosting whereby you own the server and you are responsible for all the technical aspects of your website. Contabo offers the best hosting solution for VPS hosting. This type of hosting is much better than shared because all your resources are dedicated and you are guaranteed better performance in terms of speed. Moreover, on VPS hosting, you can install as many websites as you want.
How to Buy & Setup a Contabo VPS to Install WordPress.
To make a purchase click the button below and it will take you to the company’s website.
The company’s website will open in a new tab to allow you to continue with this tutorial. You must also refer to this article Contabo Review. The article will guide you on how to step by step make a purchase and install Ubuntu and the LAMP stack. After this, successful purchase let’s move on to how to install WordPress on a VPS without using a control panel.
How to install WordPress Ubuntu 20.04
What you need to install WordPress on a VPS
I have already mentioned that you need a VPS in order to follow along. In my case I will be showing you how to do it it, on a Contabo VPS running Ubuntu 20.04. YOu will also need root access to this server. The VPS must be running a LAMP stack. This means it must have Linux, Apache, MySQL, and PHP installed. We already covered these steps in our other article on why you should use Contabo. For the sake of those that have not read that article. I will Briefly take you through how to do it.
Step-by-step Guide on How to Install WordPress on Ubuntu 20.04
Now that you have managed to purchase your VPS and set up the LAMP stack. Let us now dive into the installation process.
Step 1: Create a User and Database for WordPress
LAMP stack comes with MySQL which is the database management system for the server. This is where you will create your database table to store information such as user accounts. As mentioned earlier, you need root access. Whether you connect to the server via VNC or SSH it makes no difference although I would recommend SSH since it will allow you to easily copy and paste the commands onto your own server.
So with your root administrative account log into MySQL by issuing the following script:
mysql -u root -pIf you are unable to use root access for some reason, then you have to use the sudo keyword, before the script as shown below.
sudo mysql -u root -pOnce you are the next prompt in MySQL. Now you must provide the root the users password. to do souse the following command and replace new password with your own strong password:
ALTER USER 'root'@'localhost' IDENTIFIED WITH mysql native_password BY 'new_password';After you have successfully changed the password you can either choose to exit the setup first and, then log into MySQL once more using the new root password or you can just continue. In my case, I will just continue and, move on to creating a database which I will call WordPress. To achieve this I will use the following command.
CREATE DATABASE wordpress DEFAULT CHARACTER SET utf8 COLLATE utf8_unicode_ci;Next, we will need to create a user for this database and set a password.I will call the user “wpuser”. You can always use your own credentials to set up a user and the password. If you are copying the scripts make sure to replace the password with your own.
CREATE USER 'wpuser'@'%' IDENTIFIED WITH mysql_native_password BY 'password';After the user has been successfully set up, we must now grant access. The user we created needs complete access to the database. this can be achieved with the following script.
GRANT ALL ON wordpress.* TO 'wordpressuser'@'%';Lastly, we now need to update the current instance of MySQL with the changes we have made. To do this we apply the command below:
FLUSH PRIVILEGES;Now we type exit as below in order to leave the MySQL configuration section.
EXIT;Step 2: Install Essential PHP Extensions
During the installation, we did when we purchased our VPS and installed the LAMP stack. We did not install all the PHP extensions that are required for WordPress to function properly. We can download and easily install these extensions using the following scripts below.
sudo apt update
sudo apt install php-curl php-gd php-mbstring php-xml php-xmlrpc php-soap php-intl php-zip
After the installation is done we are going to restart apache. This will allow for the installed extensions to be loaded when it restarts.
sudo systemctl restart apache2Step 3: Edit Apache’s Configuration
If you have read our article on creating virtual hosts in order to host multiple websites. Then this section will look very familiar to you. We are going to make changes in order to allow for .htaccess overrides and rewrites. To achieve this we will access the conf file of our website. I would suggest or strongly recommend you create a virtual host of this WordPress website and then edit the conf file.
Part 1: Enabling .htaccess overrides
In this section, I will assume the name of your file for this website is WordPress and that is the name I will use to refer to the conf file. So we will open the conf file in the following.
sudo nano /etc/apache2/sites-available/wordpress.confOnce open please see the below output. Add the Allow Override All directive on the Virtual Host configuration files as shown.
<VirtualHost *:80>

.....

        <Directory /var/www/wordpress>
        	Options Indexes FollowSymLinks
        	AllowOverride All
        	Require all granted
       </Directory>


.....
</VirtualHost>
Once you are done you can save the file. You can also open the file /etc/apache2/sites-available/wordpress.conf using WinSCP.
Part 2: Enabling the Rewrite Module
The next now is to enable the mod_rewrite which will enable you to use permalinks in WordPress. To do this we use the following command:
sudo a2enmod rewriteTo implement the changes we now need to restart Apache.
sudo systemctl restart apache2Step 4: Let’s Download WordPress
Now it’s time to get to the business end of things. In the previous steps, we have been preparing the server for us to be able to use WordPress effectively. We still have a few more changes to make. Before we start installing by downloading WordPress it is best practice to use a temporary folder or directory for the download. Effectively you can just download WordPress into the root folder, which is what we are going to do now.
cd /var/www/wordpress
curl -O https://wordpress.org/latest.tar.gz
The above commands first change the directory to the root folder and then downloads the latest version of WordPress into that current folder. Next, we need to extract the compressed file.
tar xzvf latest.tar.gzStep 5: Adjusting the WordPress Directory Settings
Now that we have accomplished the fundamental steps in understanding how to installation of WordPress on a VPS without using a control panel. They are other key settings that we need to adjust to make it more usable. More importantly, we need to set up reasonable file permissions and ownership. We will use the chwon command to adjust the ownership of the directory.
Part 1: File permissions and Ownership
sudo chown -R www-data:www-data /var/www/wordpressNext, we are going to apply the following scripts separately.
sudo find /var/www/wordpress/ -type d -exec chmod 750 {} \;
sudo find /var/www/wordpress/ -type f -exec chmod 640 {} \;
Part 2: WordPress Configuration file
After adjusting directory settings, we now need to make changes to the actual WordPress configuration file. The first step is to make sure that our WordPress installation is secure. To achieve this WordPress provides a secure values generator that will produce unique values that you can input into your configuration file.
To generate these values we use the following script.
curl -s https://api.wordpress.org/secret-key/1.1/salt/From running that script you will get output to the one displayed in the window below:
Output
define('AUTH_KEY',         '1kl/vqfs<XhdXoAPz9 DO NOT COPY THESE VALUES c_j{iwqD^<+c9.k<J@4H');
define('SECURE_AUTH_KEY',  'C-?y+K0DK_+F|0h{!_ DO NOT COPY THESE VALUES {Ka(f;rv?Pxf})CgLi-3');
define('LOGGED_IN_KEY',    'W(50,{W^,OPB%PB<JF DO NOT COPY THESE VALUES 2;y&,2m%3]R6DUth[;88');
define('NONCE_KEY',        'Lksdseo)9a+8<!4VM+ DO NOT COPY THESE VALUES #`DXF+[$atzM7 o^-C7g');
define('AUTH_SALT',        'koMrurzOA+|L_lG}kf DO NOT COPY THESE VALUES  07VC*Lj*lD&?3w!BT#-');
define('SECURE_AUTH_SALT', 'p32*p,]z%LZ+pAu:VY DO NOT COPY THESE VALUES C-?y+K0DK_+F|0h{!_xY');
define('LOGGED_IN_SALT',   'i^/G2W7!-1H2OQ+t$3 DO NOT COPY THESE VALUES t6**bRVFSD[Hi])-qS`|');
define('NONCE_SALT',       'Q6]U:K?j4L%Z]}h^q7 DO NOT COPY THESE VALUES W(50,{W^,OPB%PB<JF
Do not use the values above instead, use the values that were generated on your server. You can open the wp-config.php file in two ways. Either you will use WinSCP to navigate to the directory and then open the file or you can use the nano command and start working on the file.
sudo nano /var/www/wordpress/wp-config.phpOnce open you need to enter the salt values generated before into the config file.
Output: of the /var/www/wordpress/wp-config.php
. . .

define('AUTH_KEY',         'put your unique phrase here');
define('SECURE_AUTH_KEY',  'put your unique phrase here');
define('LOGGED_IN_KEY',    'put your unique phrase here');
define('NONCE_KEY',        'put your unique phrase here');
define('AUTH_SALT',        'put your unique phrase here');
define('SECURE_AUTH_SALT', 'put your unique phrase here');
define('LOGGED_IN_SALT',   'put your unique phrase here');
define('NONCE_SALT',       'put your unique phrase here');

. . .
As part of the file configuration, you will also need to enter essential database information. See the output below:
. . .

// ** MySQL settings - You can get this info from your web host ** //
/** The name of the database for WordPress */
define( 'DB_NAME', 'yourowndbname' );

/** MySQL database username */
define( 'DB_USER', 'yourownusername' );

/** MySQL database password */
define( 'DB_PASSWORD', 'yourownpassword' );

/** MySQL hostname */
define( 'DB_HOST', 'localhost' );

/** Database Charset to use in creating database tables. */
define( 'DB_CHARSET', 'utf8' );

/** The Database Collate type. Don't change this if in doubt. */
define( 'DB_COLLATE', '' );


. . .

define('FS_METHOD', 'direct');
In the above output, you need to change the DB_NAME, DB_USER and set your own DB_PASSWORD. Click save and exit once you are done.
Step 6: Install WordPress Via Web Interface
The last and final step is to install WordPress from the web interface. To achieve enter the domain name or server IP address in the address bar.
https://server_domain_or_IP
If you have done everything correctly. in your browser, the following output will appear. Once that comes up you can select a language.
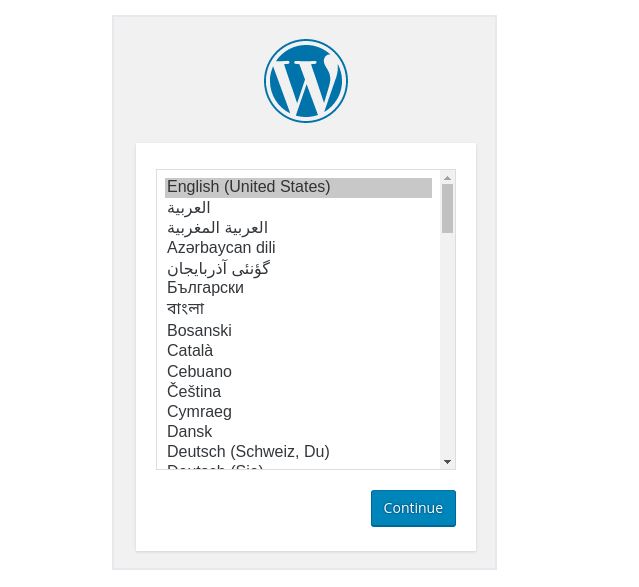
After you select your language you will be redirected to a page that will ask you for the user name and password. You must understand in some cases you will enter the correct user name and password but still fail to log in. if you are experiencing that problem, you can log in to PHPMyAdmin and reset the user password to a new one. At least that is one way to resolve that problem.

The username and password that you using at this stage is the one that we configured earlier in Step 1 in this article. After you have entered all the required information you must click install.
Conclusion
In this article, we have managed to cover how to install WordPress on a VPS with no Cpanel. We looked at what you need in terms of a VPS with root access. We also covered the alternatives to installing your own WordPress on a VPS, which is to go for a Managed WordPress solution with Bluehost. After reading this article you must be able to install WordPress on a VPS running Ubuntu 20.04, hosted by Contabo or another company.