
The pain of setting up a blog/website, buying a domain, and hosting only to be rejected for monetization is all too familiar for us all. The intention of most bloggers is not just to produce content, but to be able to earn a decent income from your passion or troubles depending on why you are blogging or building your website in the first place.
If you are running a blog/website as an online business, one of the most popular ways to generate income is through the Adsense program. Recently on my website digitalfreshman.com, I managed to get approval within 24hrs of after submitting my application and I’m going to share how and what I did in a few steps so that you can also implement the same strategy.
Step 1: Blog Preparation and Setup
My website currently is hosted on Blogger, and I used a free theme called Polar by way2themes. But if you are using a WordPress website with a different hosting provider such as Bluehost the same concepts and principles will still apply. It s is important to note that when it comes to Bluehost as a beginner you can get a free dot com domain name and you have access to great support on a platform that has more features than blogger. So if you would like to run a WordPress blog/website with a Bluehost just click here to get started.
For my domain name I used Namecheap, they have great support and affordable prices on a variety of their services. You can click here to get yourself an affordable domain name.
Step 2: Layout
On your website or blog make sure the layout and headings must be clear. They call this navigation. It must not be difficult to find content or identify different sections of your website. The image above is a snippet from my website. As you can see it is split into 3 different sections by heading and each section represents a topic or area of interest. The online business section covers topics on how to make money online, the Tech section looks at how to get certain technical things done and product reviews, and Insurance is for insurance and financial services related topics. Feel free to navigate around the site to get a feel of the layout.
Step 3: Contact Us
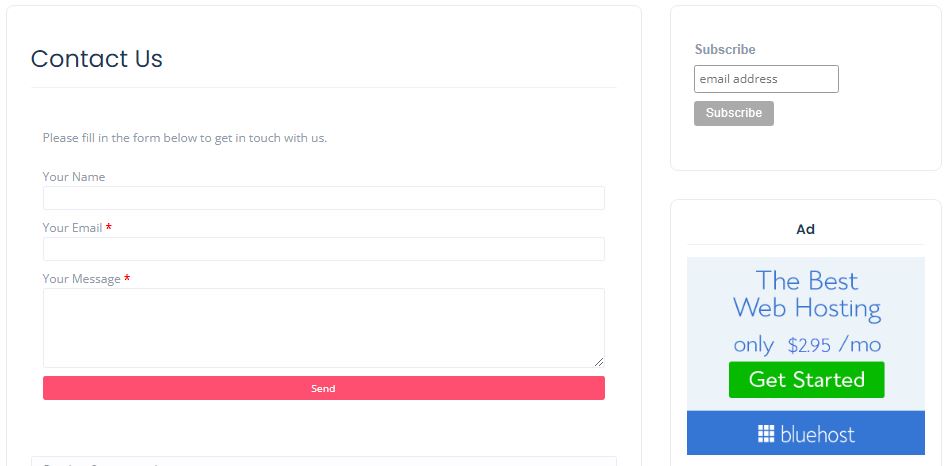
Google requires that visitors to your page must have a way to get in touch with you, and having a contact us page is a great way for people who have any questions or concerns to get in touch with you. On my website, I implemented this by adding a link on the footer of my home page. When clicked it will then take the visitors to my contact form so that they can submit their information.

Step 4: Privacy Policy and Terms Conditions
These two pages are very important and very easy to generate. Just like the contact us page I also added links to these two pages in my footer as shown in the image above. Like I said these are easy to generate so no need to engage legal experts to draft your privacy policy and terms. You can simply look for any preferred privacy policy generator tool which you can find with a google search, generate a page that meets the requirements of your website, and after that, you can simply copy and paste it to your page and you will be done.
Step 5: Content
In my case, I had 5 articles on my blog and this is what worked, most people would say go for 10 articles and I would also recommend that if you have that much time why not. Also, it is important to note that you need to add original quality and valuable content, not just anything or copied content.
I hope you found this information useful and I wish you all the best in your monetization journey. These few tips worked well for me and I hope, they will also work for you.
If you like more content from us be sure to subscribe and you will get updates on great offers.